
Tutorial 1:Getting started with NeuriteQuant
This tutorial provides step-by-step instructions to get started with a test set of images for NeuriteQuant.
Step1: Install ImageJ
Install ImageJ on your computer. It is recommended to use version 1.23 of the NeuriteQuant plugin with ImageJ version 1.40g, as this configuration was tested most extensively and was stable in many computer configurations. Versions older than 1.38 are not supported. The most recent ImageJ version 1.43u is only compatible with the updated NeuriteQuant version 1.24. Depending on the computer environment and operating system, some versions might not be stable for analysis of large datasets. You can download ImageJ from the official site for Windows or for MacOS X.
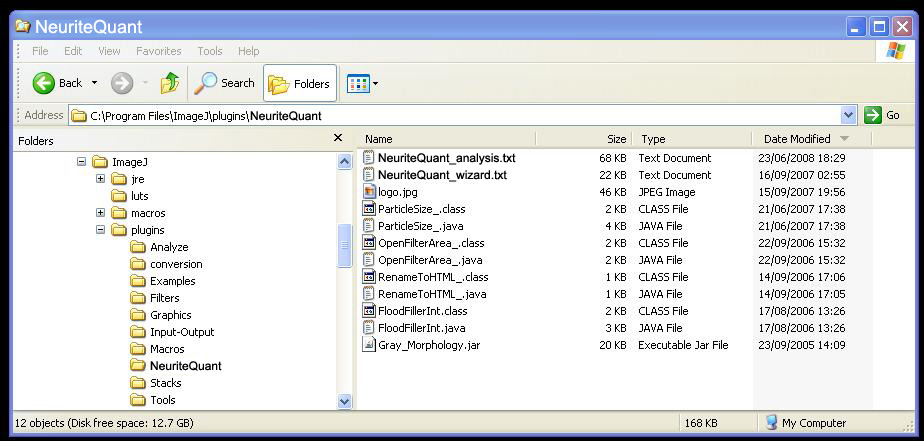
Step2: Install NeuriteQuant
Download the NeuriteQuant Archive (version 1.23) here. Extract the contents of the Archive into the ImageJ plugins folder. Make sure that all the individual files from the NeuriteQuant Archive are saved in a folder called NeuriteQuant within the ImageJ plugins folder. The resulting directory structure should look like this:
Restart ImageJ
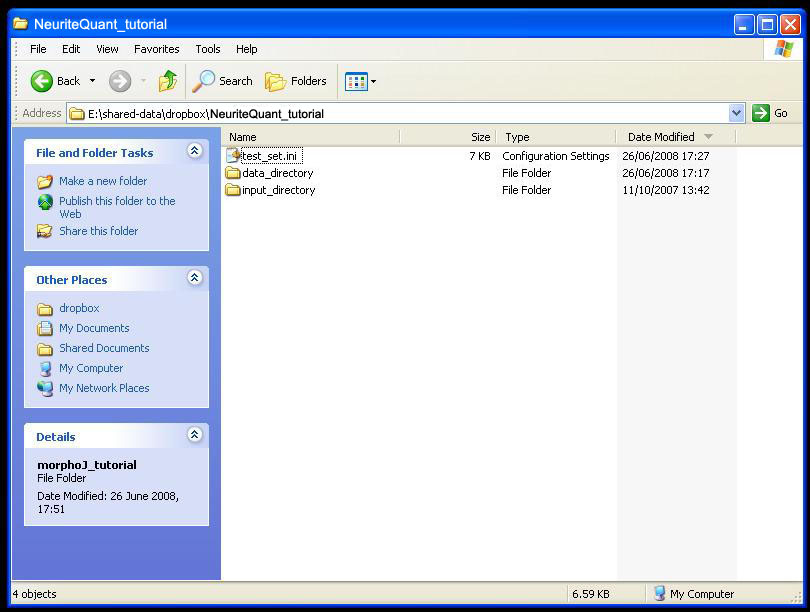
Step3: Unpack NeuriteQuant tutorial files
Download the NeuriteQuant tutorial Archive here. Extract the contents of the Archive into a directory of your choice. Make sure that the original folder structure of the archive is preserved. The resulting directory structure should look like this:
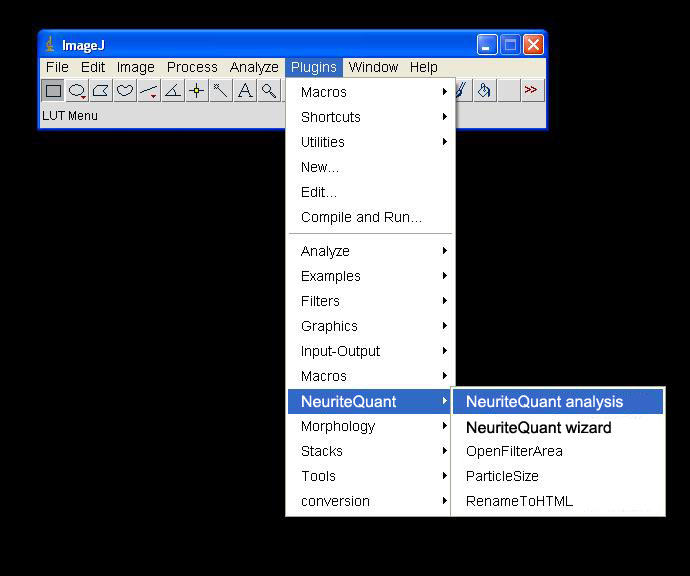
Step4: Start NeuriteQuant analysis
Choose NeuriteQuant_analysis from the ImageJ plugins Tab
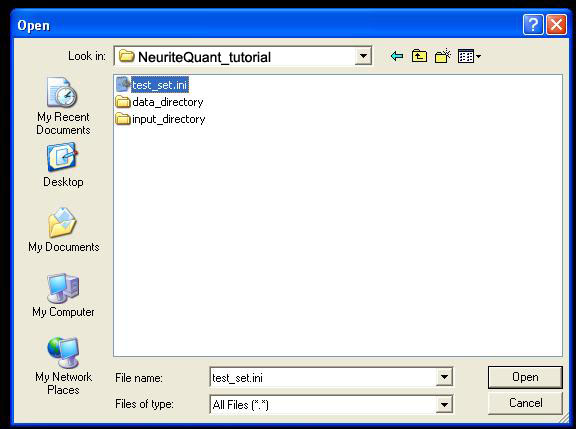
A message will open, which asks you to open a configuration file. Click OK, and
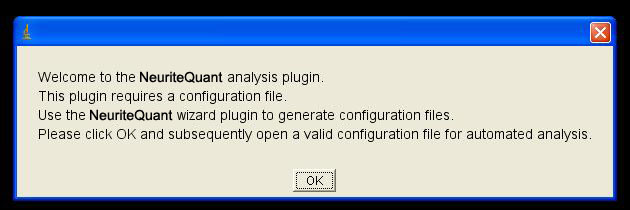
browse to the directory, into which you unpacked the NeuriteQuant tutorial archive. Select the test_set.ini file and click Select. The configuration file contains all information about the raw input data and the analysis parameters for NeuriteQuant. The configuration file for this tutorial has been preset to suitable values for the example image data.
You will now need to select the data output directory, into which the analysis results will be saved. This directory is empty by default. If you subsequently run this tutorial, make sure that the data output directory is empty, otherwise the program will interrupt to prevent data loss. To continue, select data_directory and click Open.
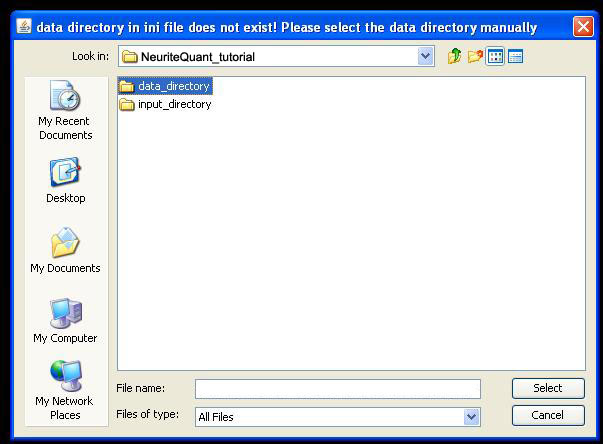
You will now need to select the input directory, in which the raw image data and annotations are saved. To continue, select input_directory and click Open.

The NeuriteQuant plugin now runs it's analysis. Do not disturb the program flow, as random clicking can lead to selection of wrong windows and possible program crashes or data inconsistencies
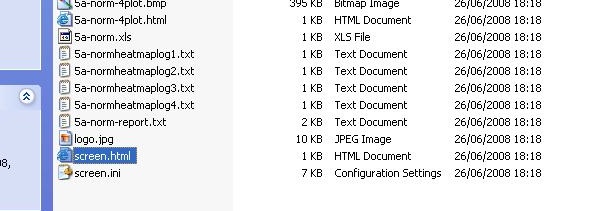
After the run, the directory data_directory is filled with analysis results. Choose the file screen.html in the data_directory and open it with a webbrowser to review the analysis.
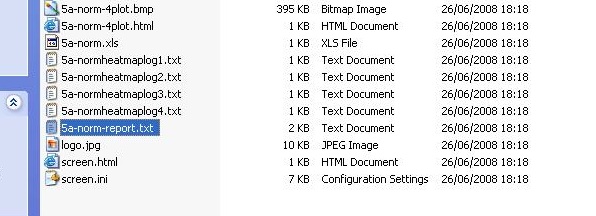
To retrieve the quantitative measurement results, open/import the analysis report file (5a-norm-report.txt) with a suitable spreadsheet Program, such as Excel.
This tutorial can give you a quick start to perform analysis of the example dataset. Additional topics such as altering the analysis parameters or optimizing analysis parameters from scratch are covered in the documentation.